ADMINISTRATION
System user groups
There are 6 system users groups for each step of the customer complaints workflow:
- users who start claims (ClaimStart);
- users who analyze claims (ClaimAnalysis);
- users who classify claims (ClaimClassification);
- users who close claims (ClaimClosing);
- users who write response (ClaimResponse);
- users who treat claims (ClaimTreatment).
The group EMAIL_CONTRIBUTORS gives rights to add email to customer complaints by adding attachments.
Create a "Customer complaint"
To be able to create a customer complaint using Workflows, it is necessary to be part of the first group. beCPG Customer Claim Entry Drivers (ClaimStart)
Once the permissions of the various stakeholders have been defined, you can create your customer complaint. A customer complaint is composed of successive steps. Each step corresponds to a user group (hence the importance of permissions). The tasks are automatically defined as follows:
- Input: All members of the pre-defined user group;
- Analysis: All members of the pre-defined user group;
- Classification: All members of the user group predefined;
- Processing: Nominative (defined at entry), the user must belong to the group: beCPG Treatment Drivers customer complaints ;
- Answer: Nominative (defined at entry), the user belongs mandatory to the group: beCPG Answer Drivers Protests customer;
- Closing: All members of the pre-defined user group.
By default, the nomenclature for the appointment of the claim is the next : YYYY-RC-No claim (1,2,3, ...) Example: 2017-RC-3
Creation and Processing of the Customer Claim - Shuttles and Validation
As for all entities:
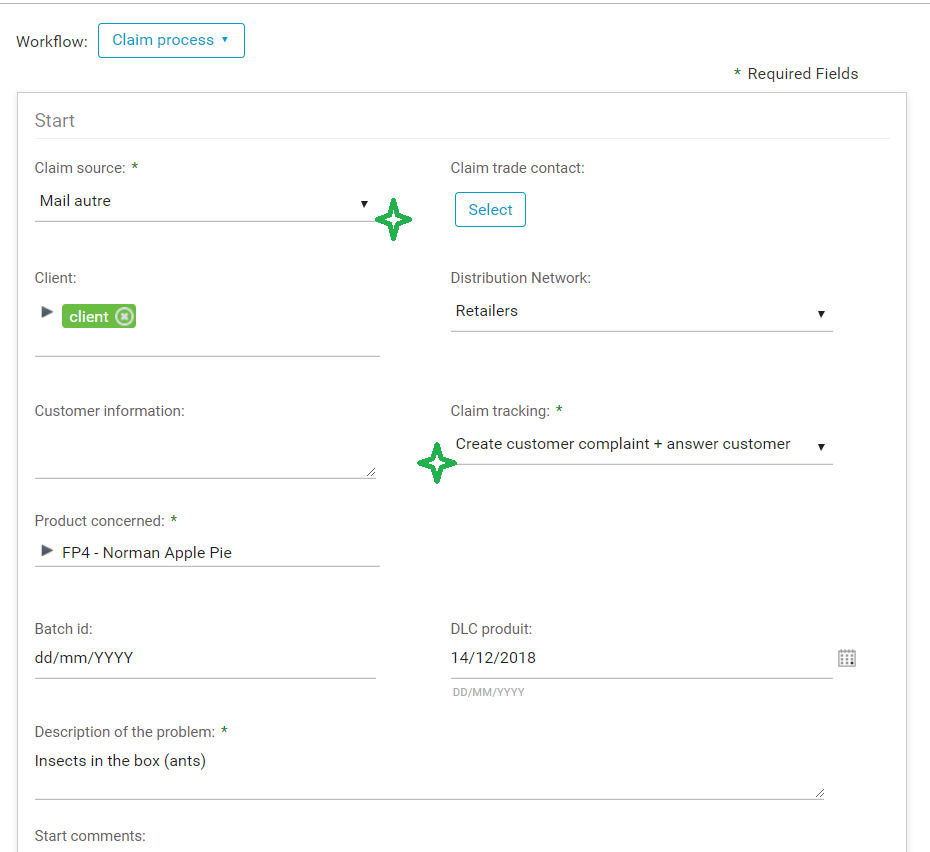
- the fields identified by a green asterix are mandatory fields,
- the fields identified by a green star are fill in BeCPG > BeCPG Administration > Characteristics system > Quality list.
1-Creating and Entering
To create a customer complaint:
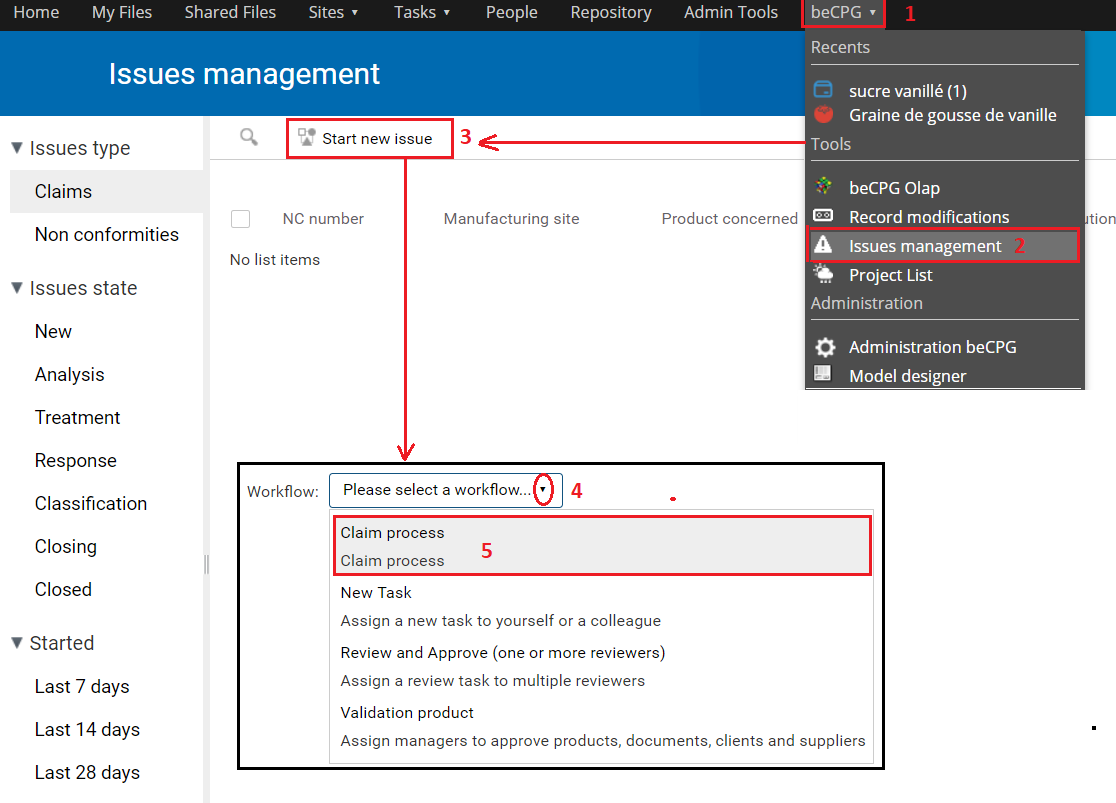
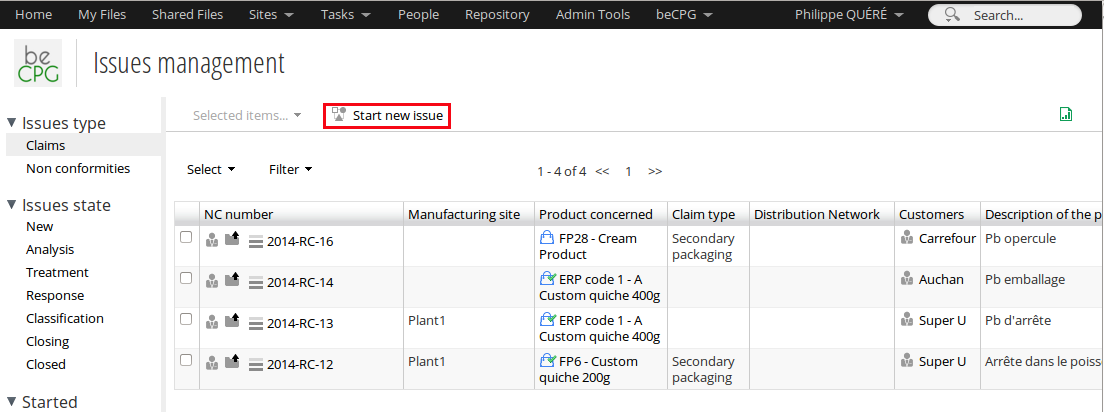
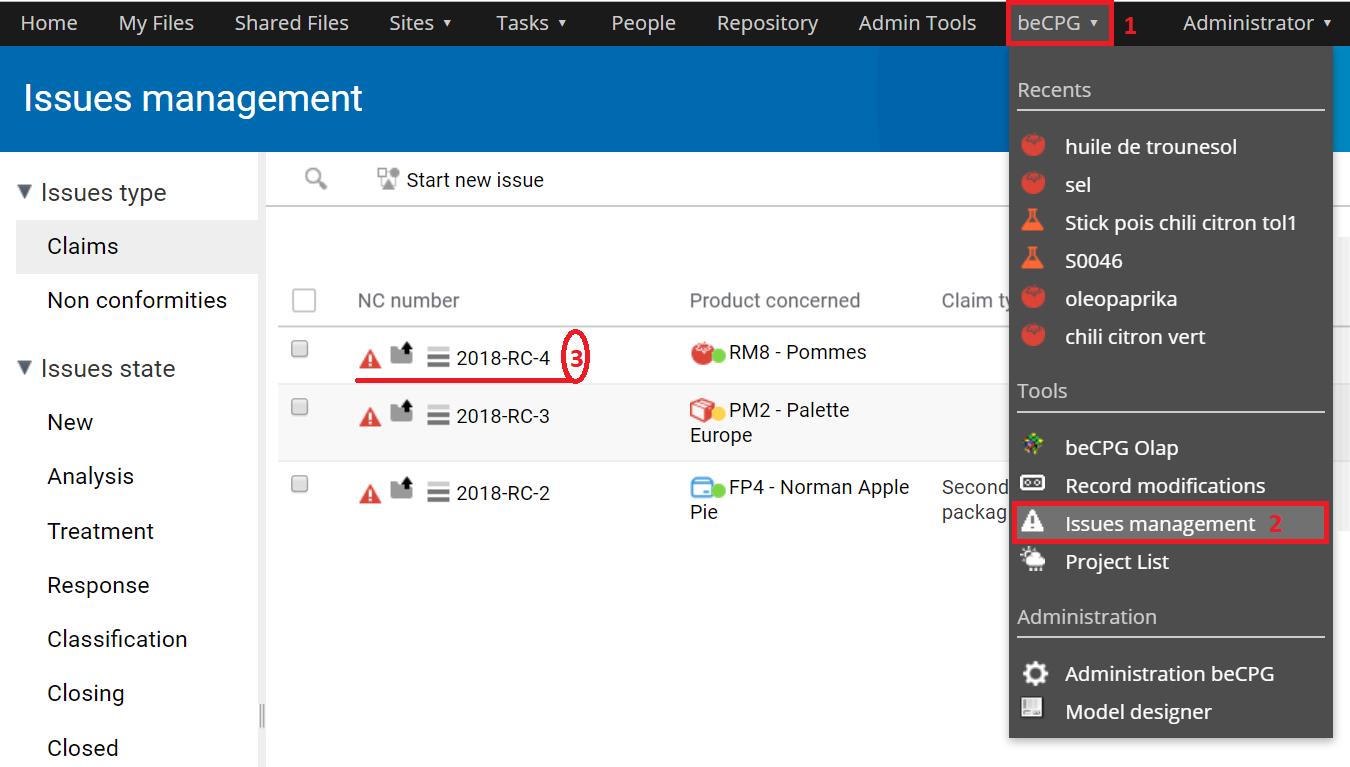
- Go to BeCPG & gt; Incident tracking;
- Click on "Report an incident";
- Choose from the drop-down menu the task: "Customer complaints".
- Fill all the fields;
- Use the "Create as a draft" option (at the bottom of the page properties of the task);
- Click Start Workflow (even in the case of a draft).
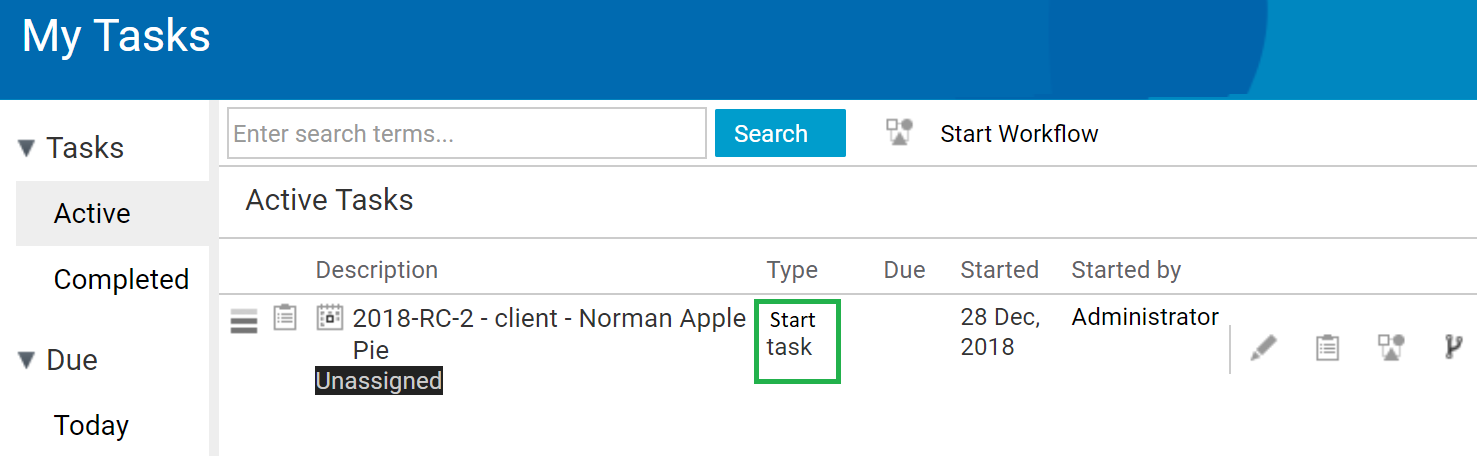
2-Using the draft mode
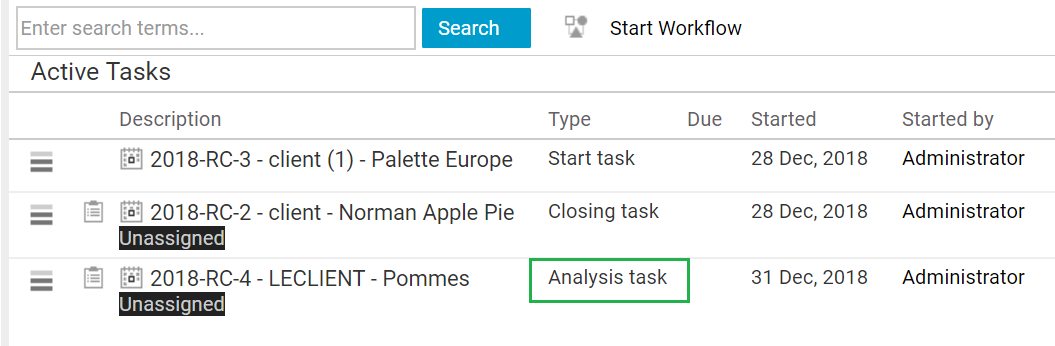
In case you have created a draft. In Tasks > My tasks, you will see a new task.
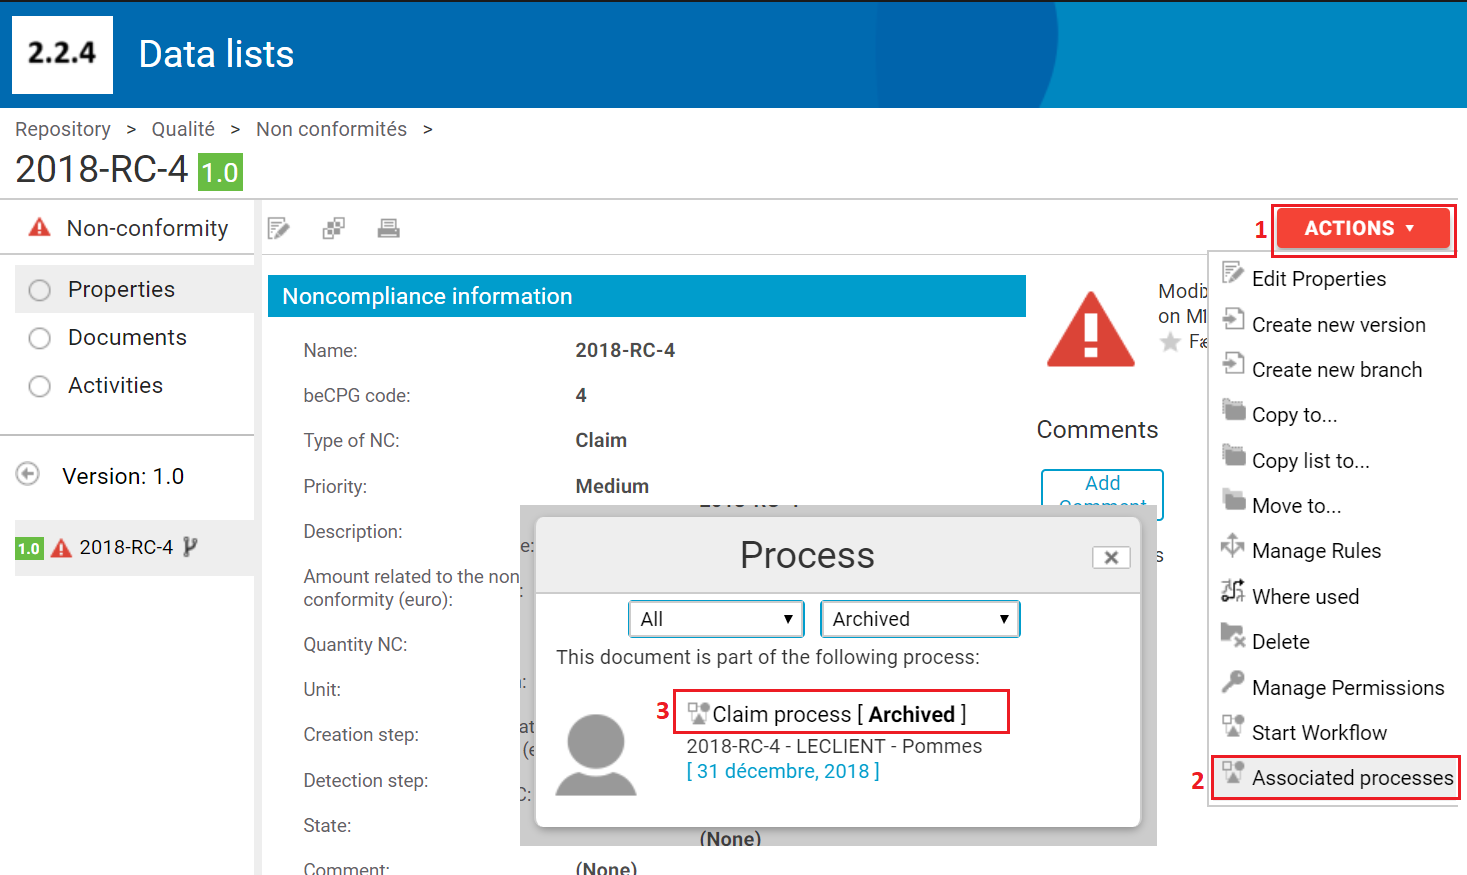
It is also possible to access workflows through incidents:
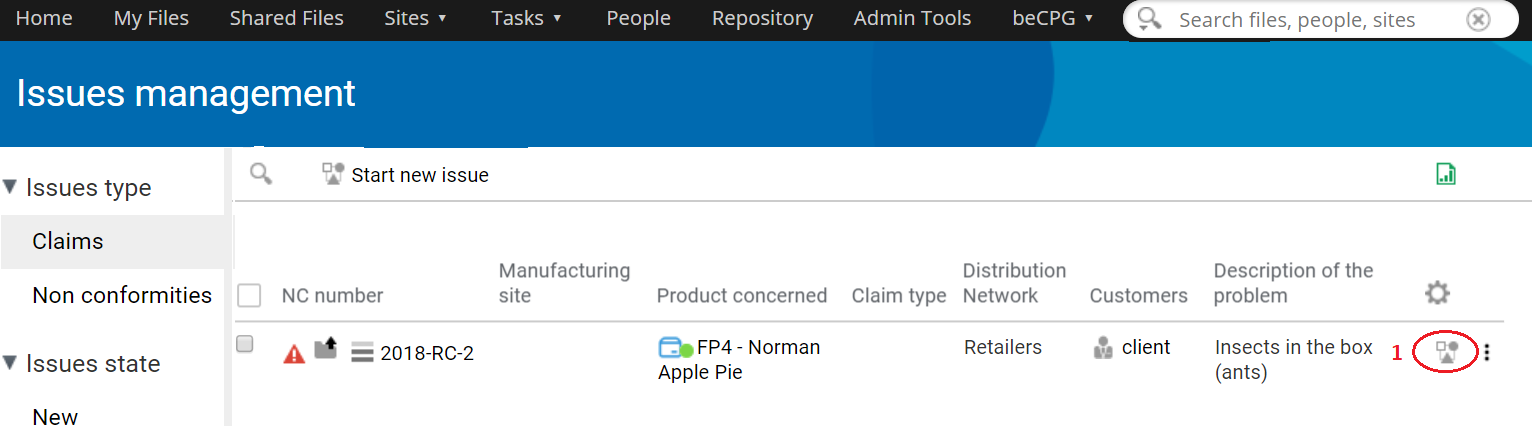
By clicking on this task, you will be able to complete the claim:
- Add attachments such as photos or documents;
- To validate the registration of the complaint: click on Finish the task;
- To continue the entry later: click on Save and to close.

To add documents, you have 3 possibilities:
A : By sending an email to the address indicated (specific to the Noncompliance);
B : By clicking ADD : you link directly to the non-compliance, a document or an existing entity already in a site. This option allows you to give quick access to documents people who will treat CR (quality procedure, another CR ...);
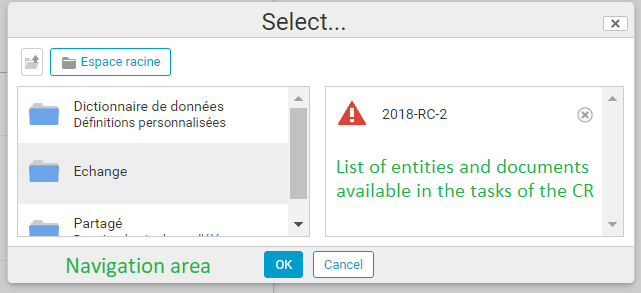
C : By dragging and dropping a document into the "Documents" folder of the Customer Claim.

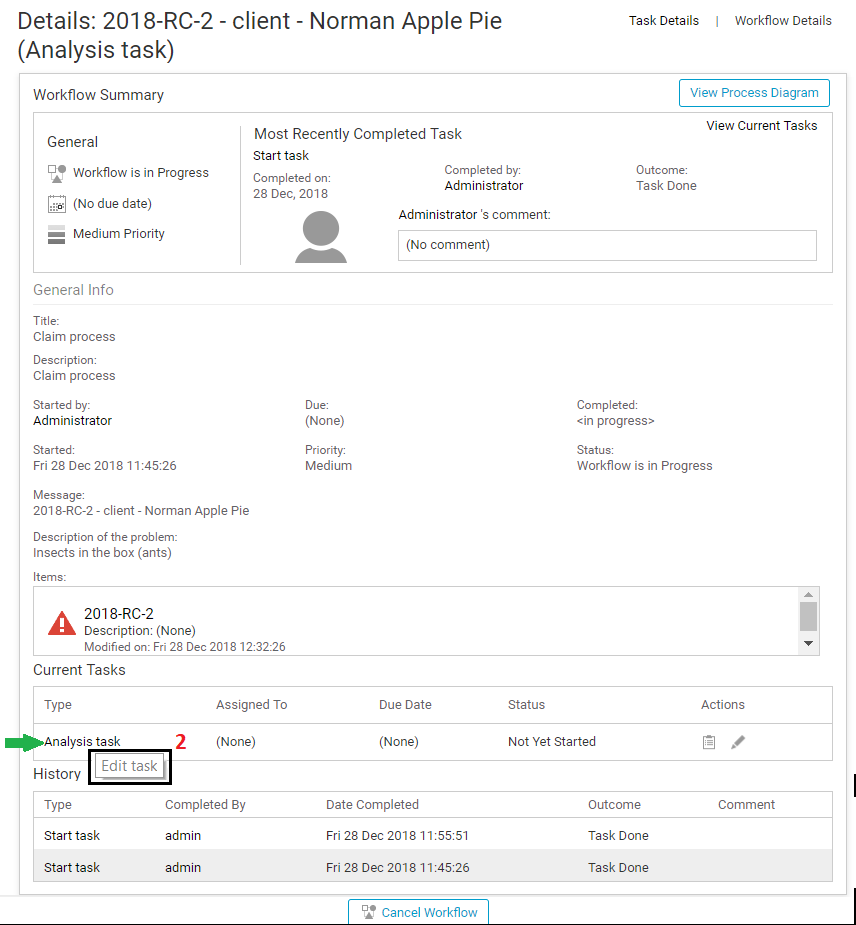
3-Claim / Orientation Analysis
The analysis of the claim makes it possible to direct the claim towards specific person.
- Go to Tasks > my tasks;
- Click on the task.
Or through incident tracking (see above)
- Fill all the fields;
- Select the people in charge of treatment and response to the client.
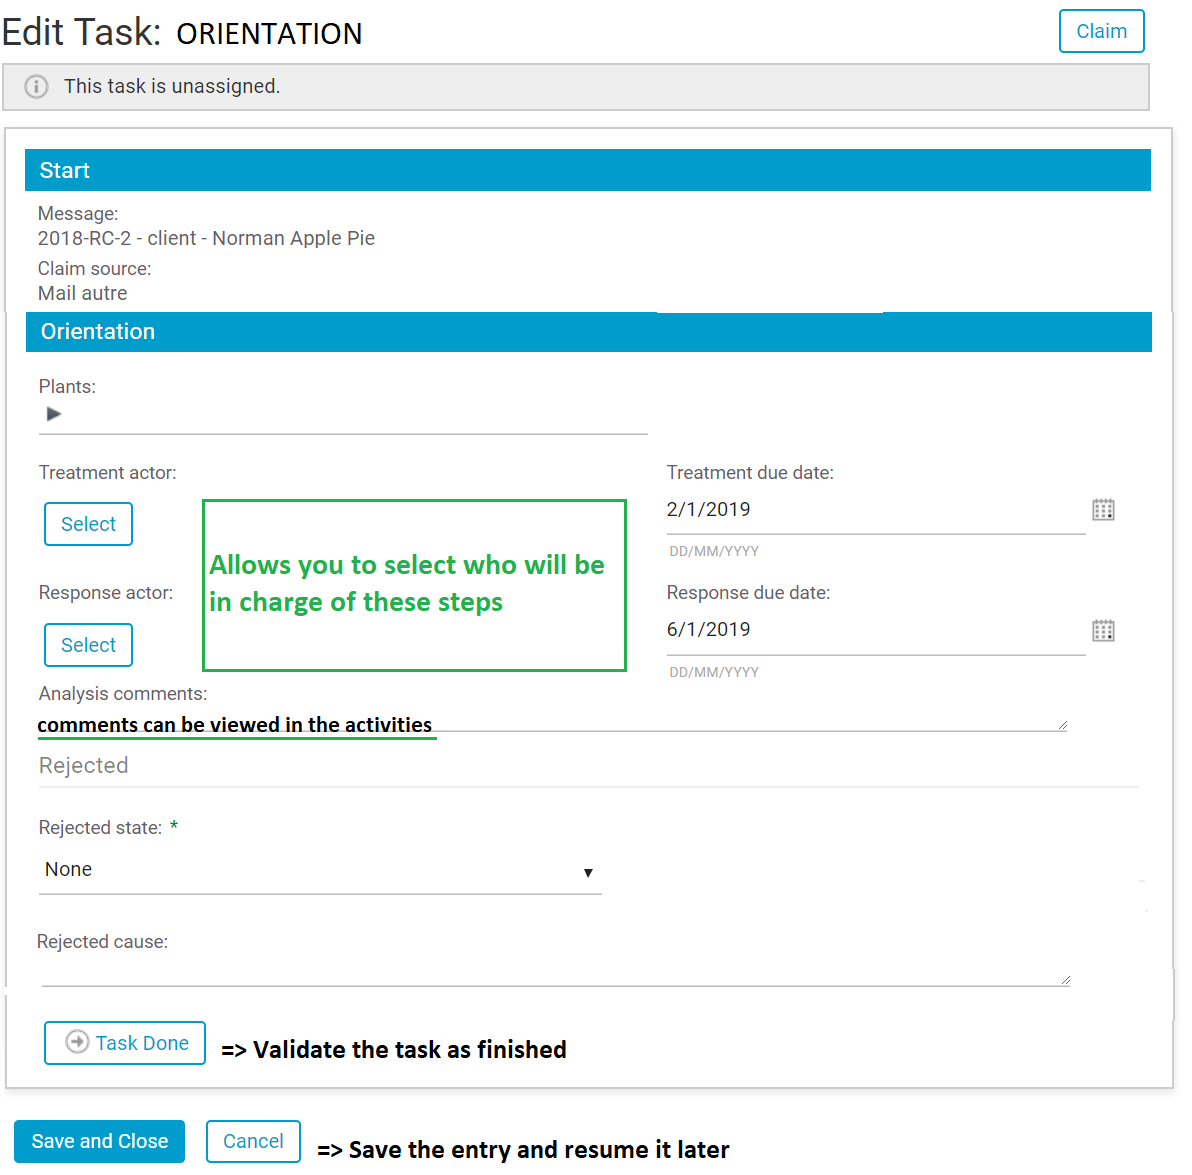
To add a user, you must click on To select :
- search the person (enter 1 letter minimum);
- click on the "+" to add it as a recipient;
- save by clicking OK.
If you want to delete a selected user: click on the small cross: " X " to the right of his references.

Once the orientation task has been validated, two independent tasks on the other will be created simultaneously:
- the classification task
- the treatment task
4-Classification
Classification classifies the claim. This ranking can be used when producing statistics.
5-Treatment
The processing allows to record the actions, the action plans and all the details needed to answer the customer complaint.
6-Answer
The "Answer" task allows the recording of the answer mode and the content of the latter. This lets you know how the answer was handled:
- sent to the sales representative so that he can answer directly to the customer,
- live management
- waiting for it to be sent (waiting for validation ...)
- ...
This information can be completed and completed in BeCPG > BeCPG Administration > Features > Quality List
7-Closing of the complaint
The "Closing" claims task is used to verify that the completeness tasks and information were correctly captured and the deadlines respected. The person who closes "closes" the Workflow and thereby "closes" the customer complaint.
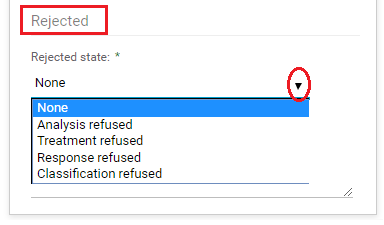
8-Refusal
At any time in the workflow, it is possible to make a refusal. This refusal can be linked to any previous or current step.
The system will loop at the rejected step. This is at say that the next step when you validate your task, will be the step at which you reported the refusal: ex: you are closing, > you detect an anomaly in the orientation, > you refuse the "orientation" task, > the next step in your workflow will be the "orientation" task.
- Select the refusal step
- Write the reason for refusal
You will find in the Activity or Work Journal list of your complaint, the history of the steps (see next point: Activity list or Work Journal). However, if you modify fields following the refusal, the system will not keep the history of your previous entries. He will keep however, comments on the levels of the work log steps.
The customer complaint and quality system
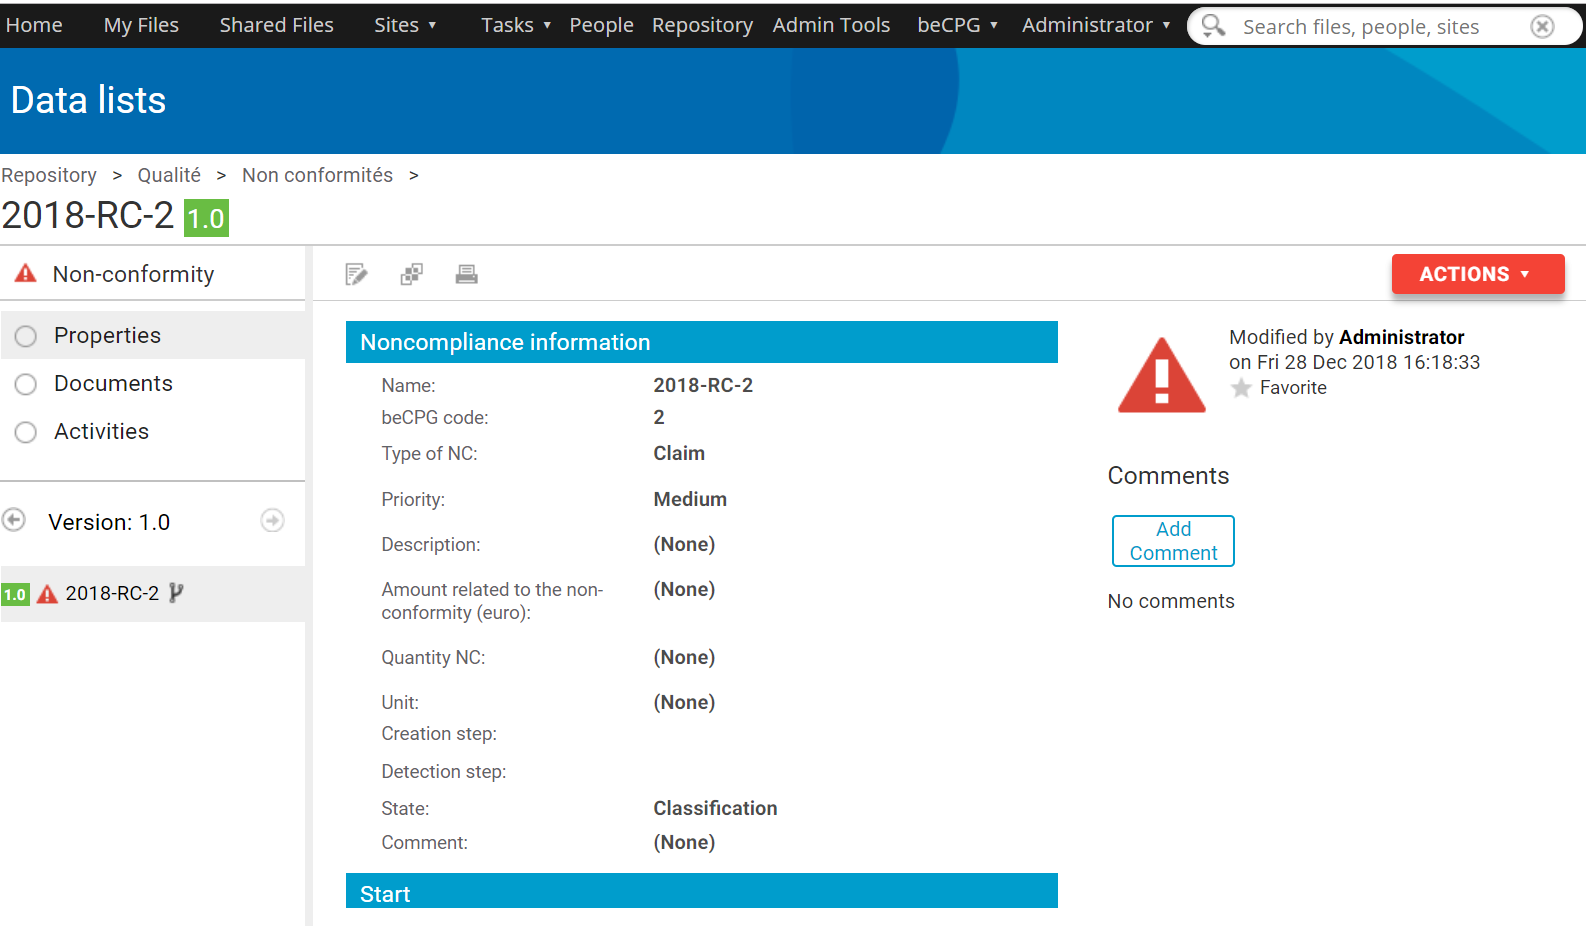
During the processing of the Customer Claim, it is possible to consult at any time using the link below. He is present in all stages at the end of each task.

1-Property of the entity "Customer Claim"
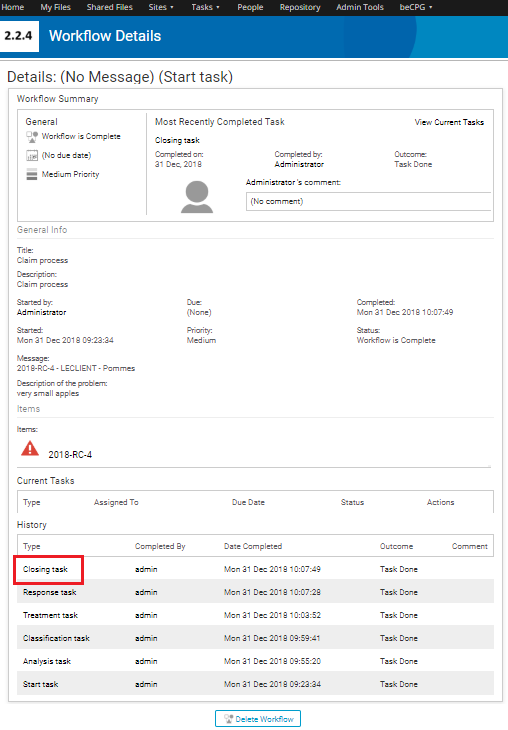
2-Work Journal of the "Customer Claim" (old version)
The newspaper traces step by step the various actions by specifying the dates and the user having realized them. It is possible to add comments in the work log (double click in the case / write your comments / save).
2-Activities and history of the "Customer Claim" (new version)
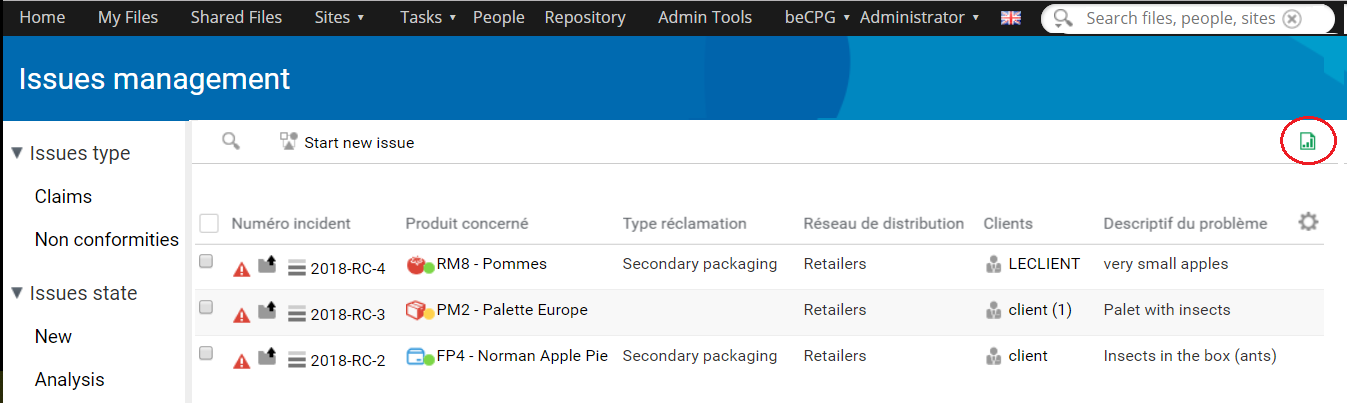
Extraction of incidents
From the "Incident Tracking" page, it is possible to export the customer complaints to an Excel file in the format \ *. xlsx.
- Click on the Export icon (green icon);
- Save file;
- Open the file with a spreadsheet such as Excel.
Configuration of system lists
It is possible to set the lists of values used in the customer complaint process since BeCPG > BeCPG Administration > System Features > Quality lists

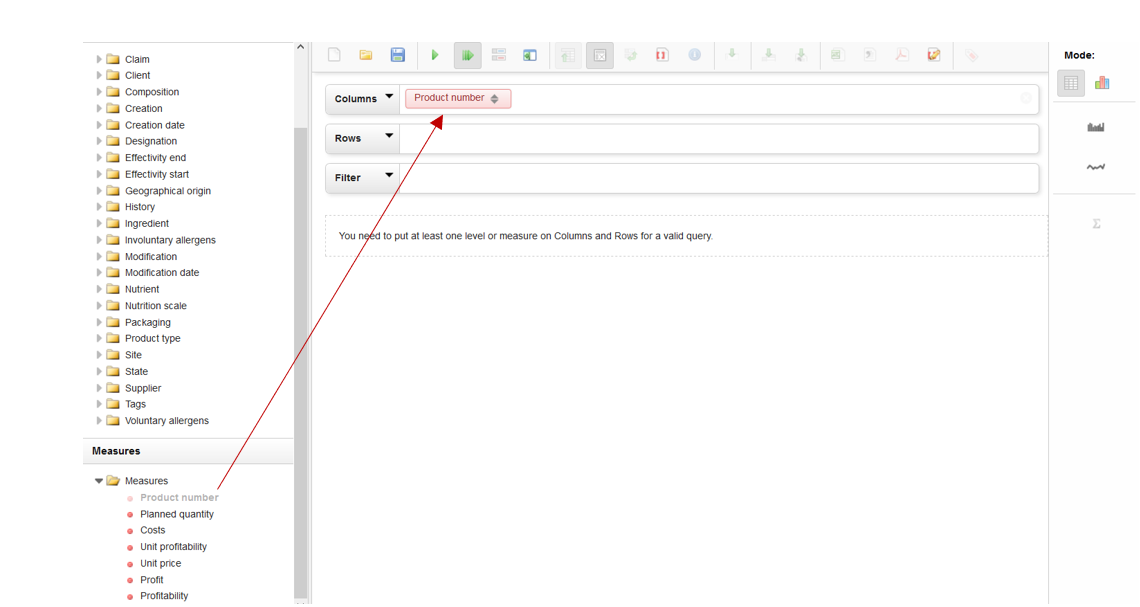
OLO Statistics - Business Intelligence
As a reminder for access to OLAP: beCPG > beCPG OLAP
Choose "Incidents"
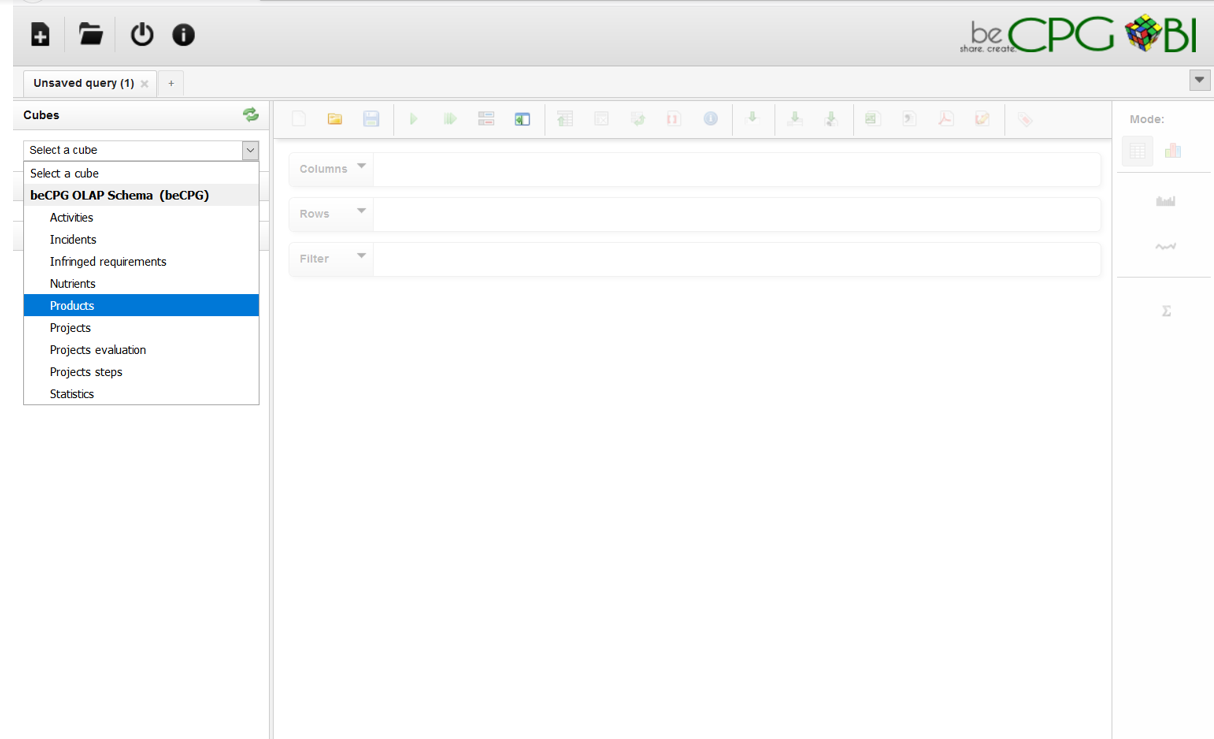
It is possible at any time to simply generate graphics.
As a reminder: you will have J-1 statistics. That is, all the changes of the day will not be taken into account only the next day in OLAP.