Supplier Portal
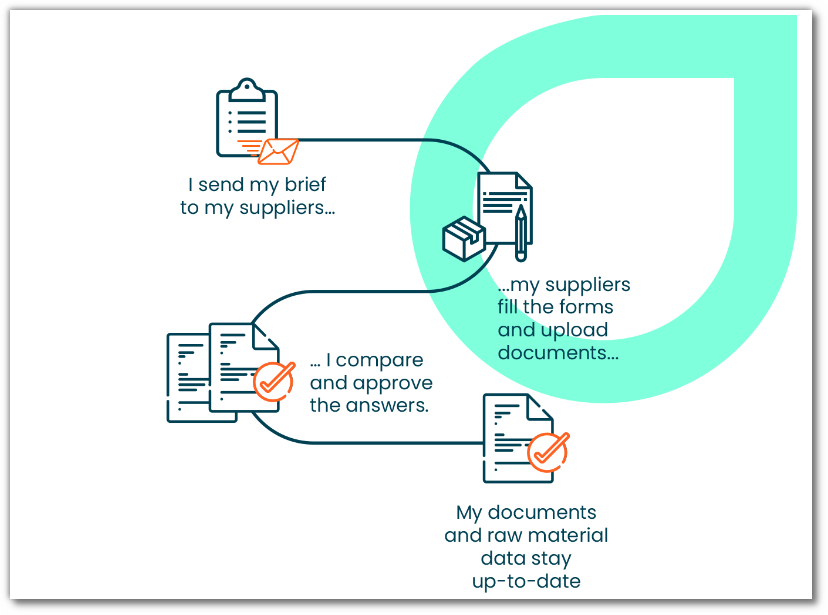
The supplier portal facilitates collaboration with your suppliers. It collects data on raw materials, packaging, trading products and their associated documents.
Rights management for collaborators
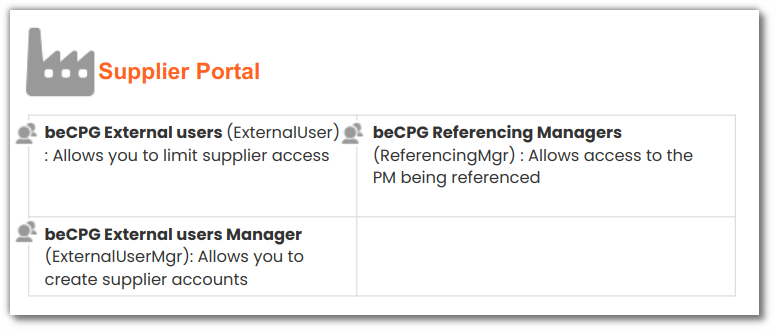
Users in charge of referencing must be added to the group: beCPG Listing managers, beCPG Quality managers and beCPG External user managers.
Create a supplier
Create a user account for the supplier
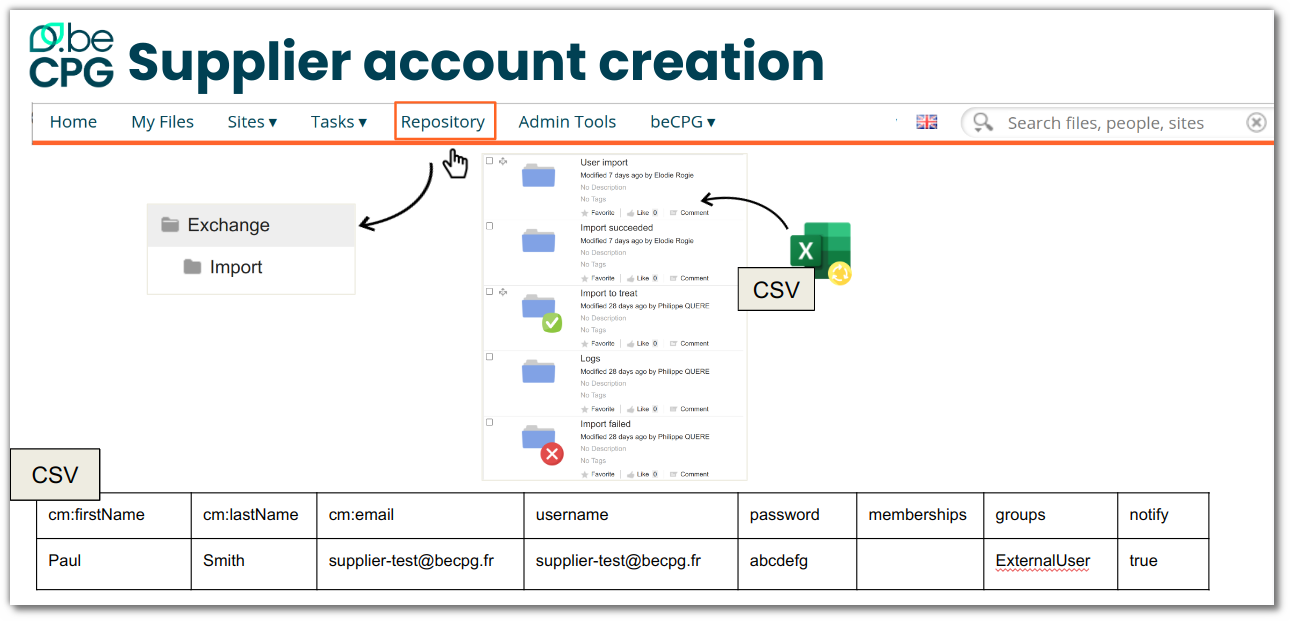
There are 3 ways to create supplier accounts in beCPG, depending on your version and whether you have SSO.
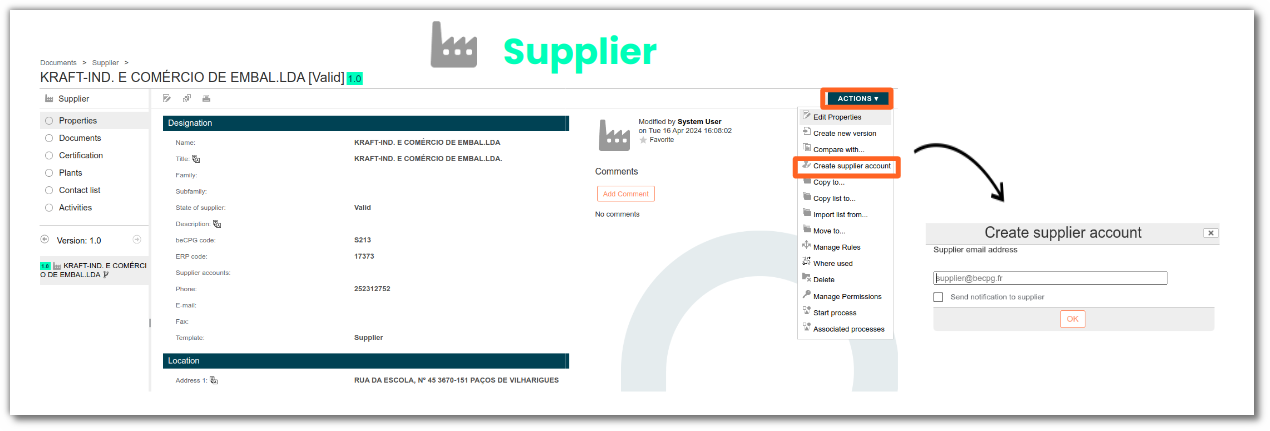
- On the supplier Click on Action then Create supplier account. Fill in the supplier's email address and check the “Send notification to supplier” box, so that the supplier receives his/her login details for beCPG. Once you click on the OK button, the system will create a user account, and associate it with the supplier.
- Via an import
- In administration
In beCPG > AdministrationbeCPG, click on “Users” to create a new user account for the supplier. Be sure to add it to the group : beCPG External users.
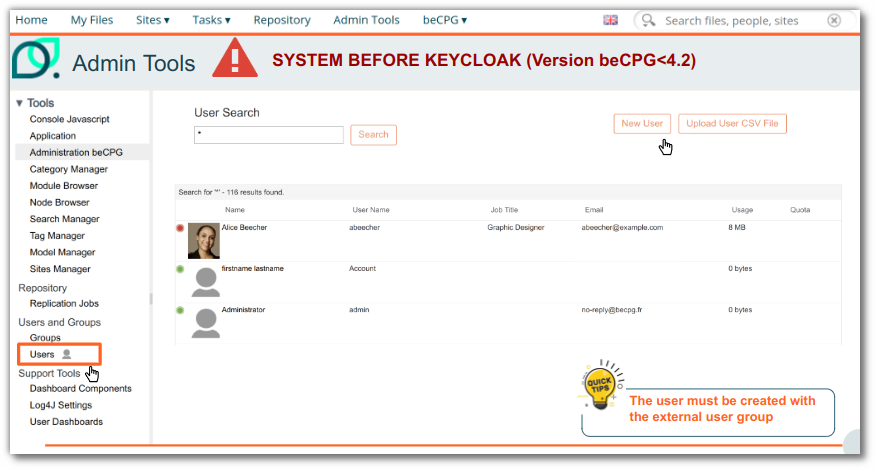
Warning: the account must be created with the beCPG External Users group; if you add the group after the account has been created, visibility is not restricted.
The beCPG External Users group does not need to be added to the supplier portal site. Specific permissions are managed directly on the group.
Associate the supplier with a user account
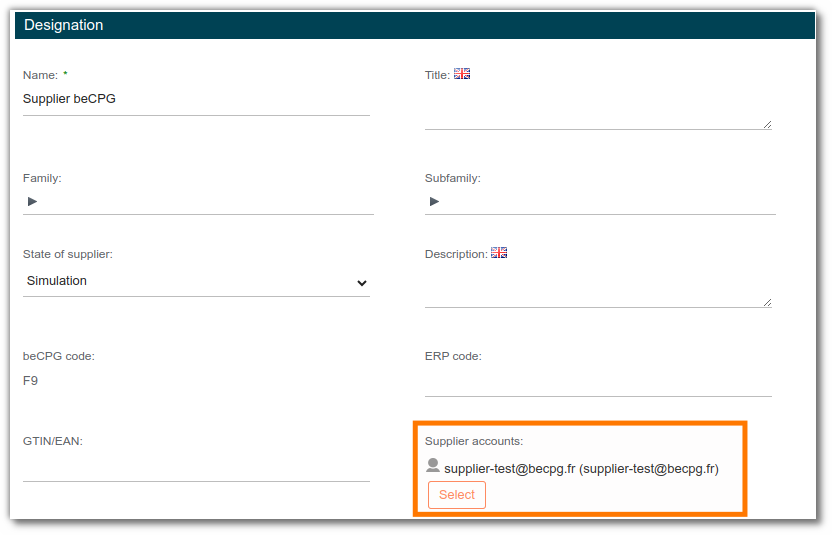
In the case of option 2 or 3, the supplier account must then be linked to a supplier entity in beCPG.
Raw material referencing
Sending raw materials to the supplier
On the raw material you wish to send to the supplier, check that it is linked to the supplier and that the supplier has an associated account in beCPG.
To send to the supplier, start a process via the “Actions” button.
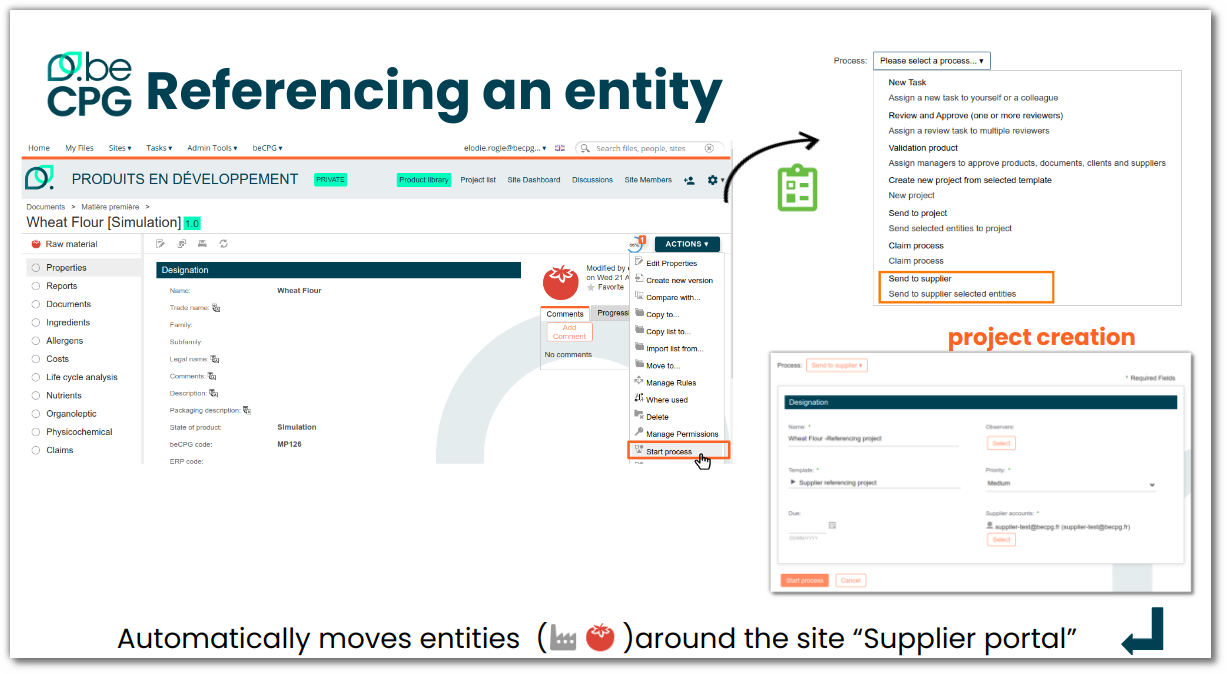
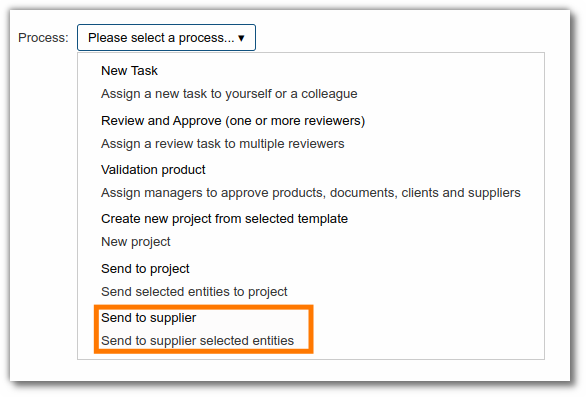
Then choose the Send to supplier option and select the “ Referencing project ” project template.
Then complete the information required to create the project.
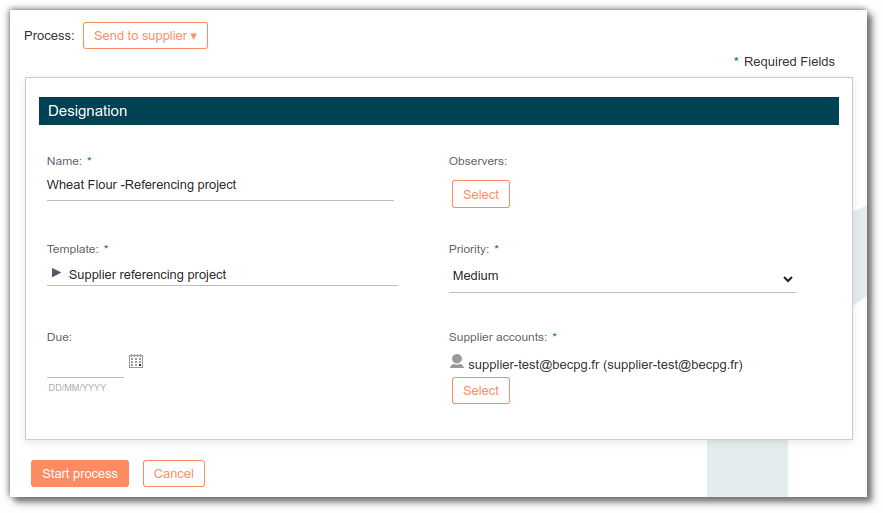
When a project is created, a working copy is created for the supplier via a new version.
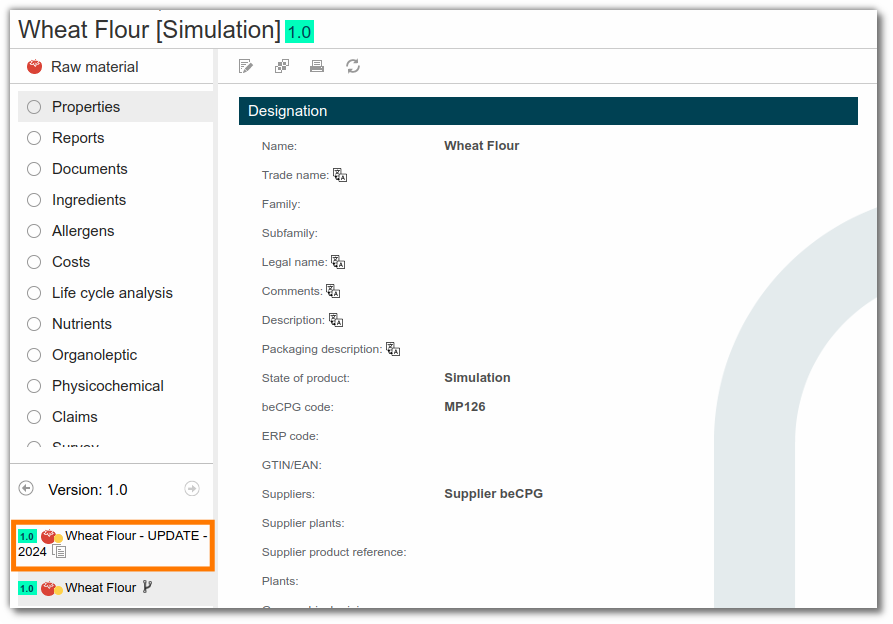
Referencing
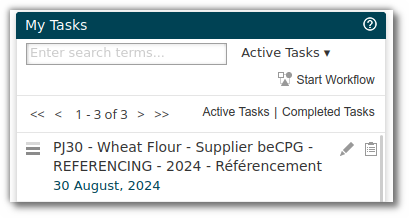
Once the task has been sent to the supplier, the supplier receives a task linked to this referencing job on his dashboard.
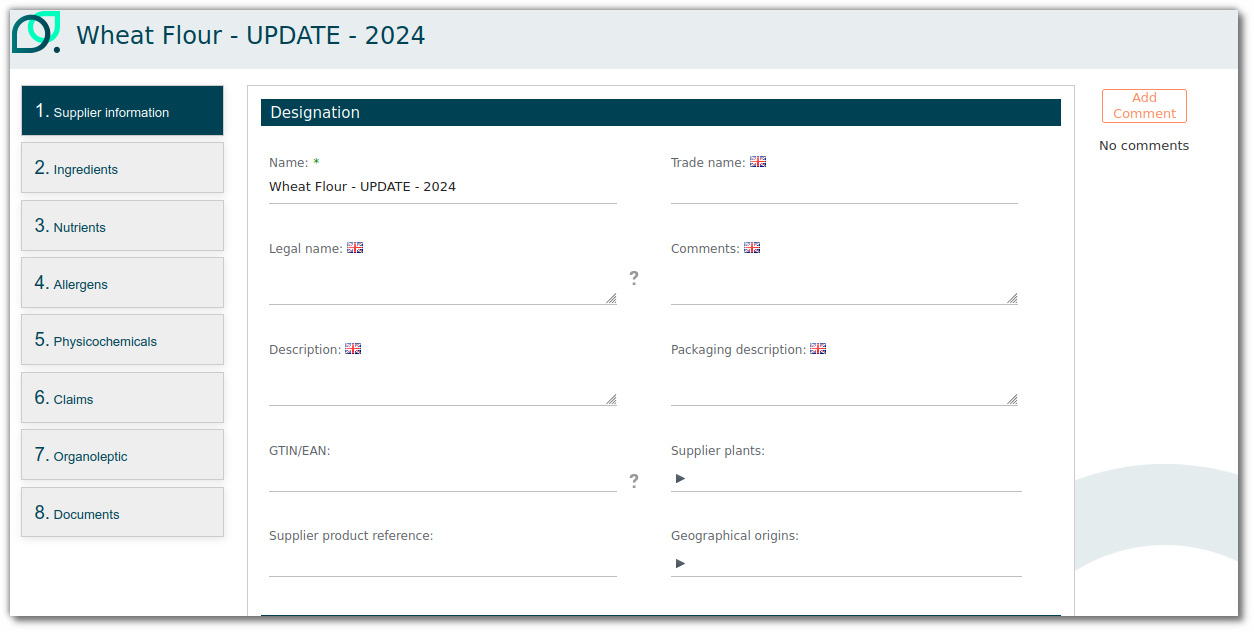
When the supplier accesses his task, he is shown a form associated with the RM referencing.
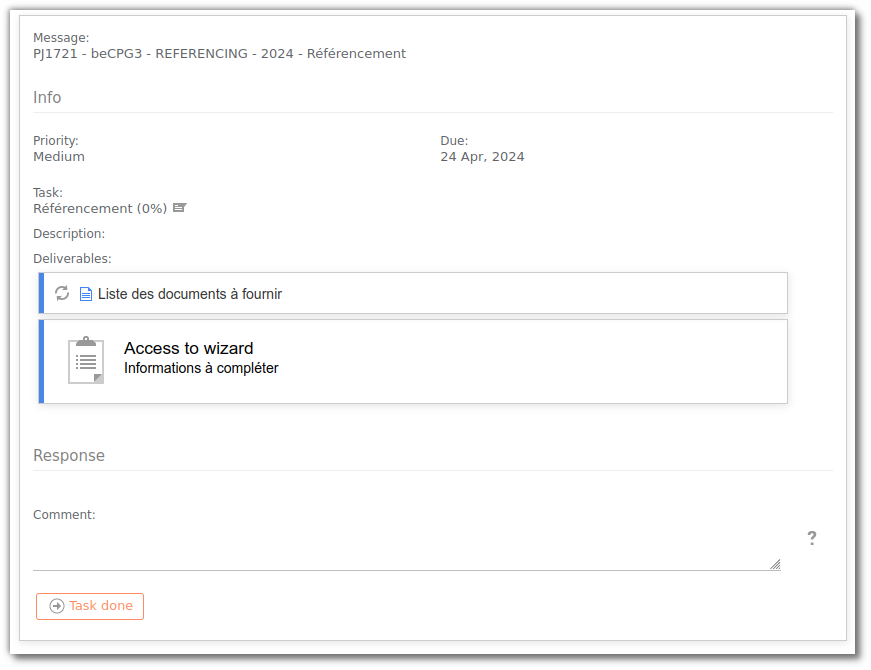
This ergonomic form allows you to fill in all the information specific to the RM:
- Supplier informations
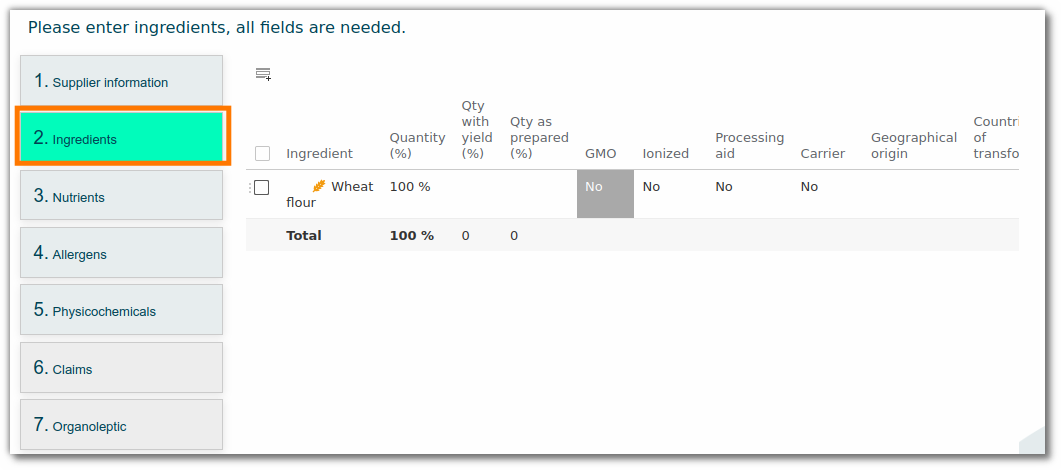
- Ingredients
- Nutrients
- Allergens
- Physical-chemical
- Claims
- Organoleptic
- Documents
Referencing validation
When the supplier has completed all the information and validated the task, you will receive a notification to check the information entered.
You can validate the task if all the information are correct.
Otherwise, you can reject the task to the supplier if any information is missing:
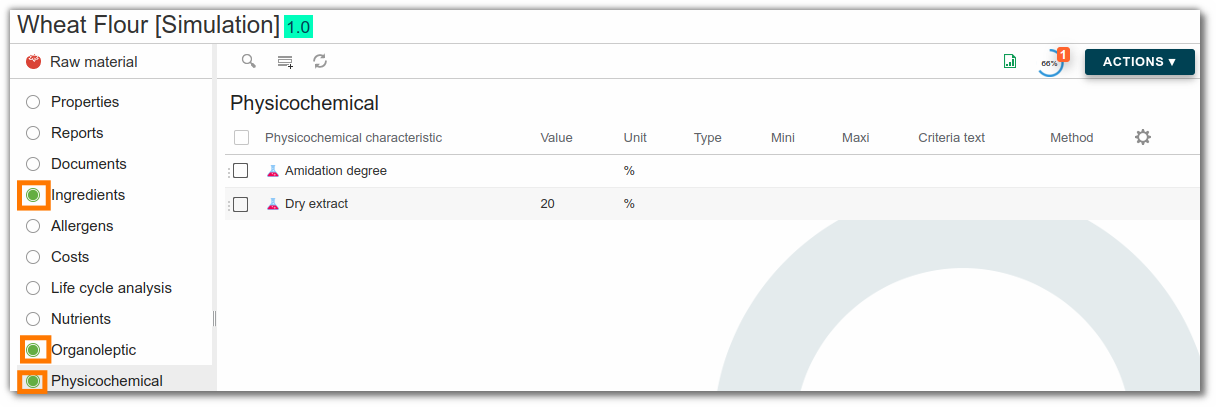
- You can validate lists that are correct. To do this, click on the icon next to the list. This will block the supplier's entry.
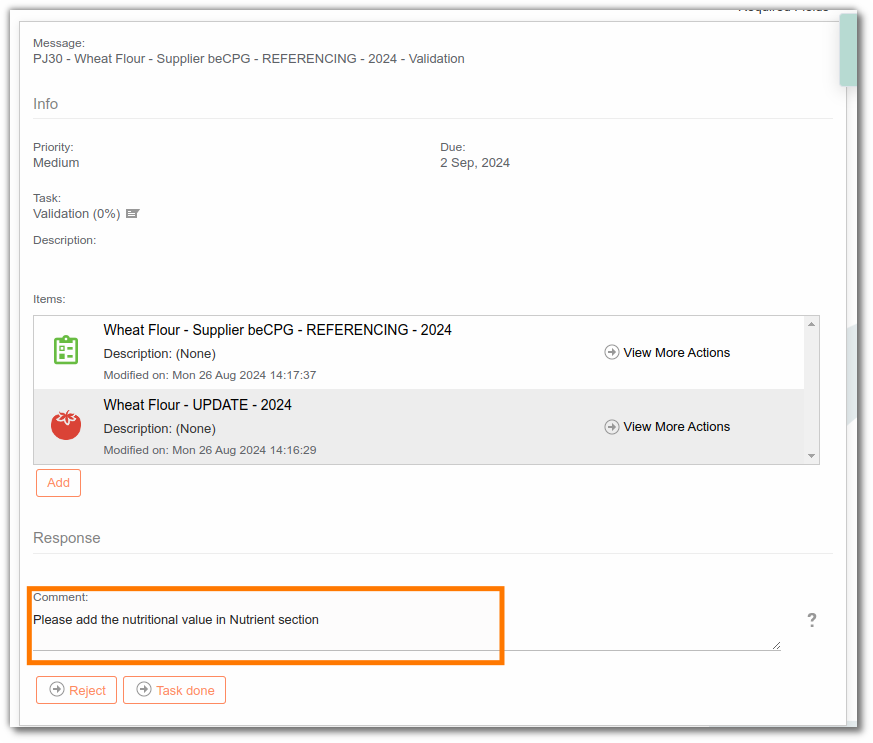
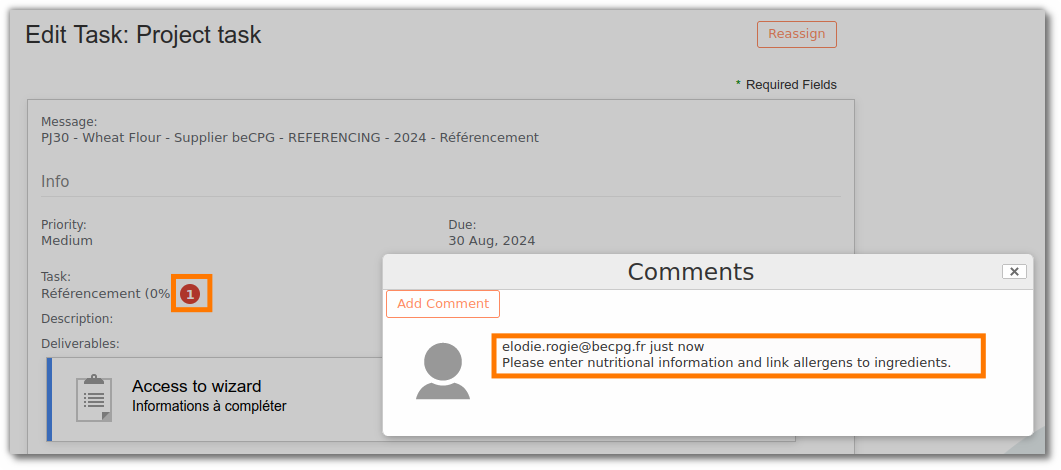
- Add your comments to the task
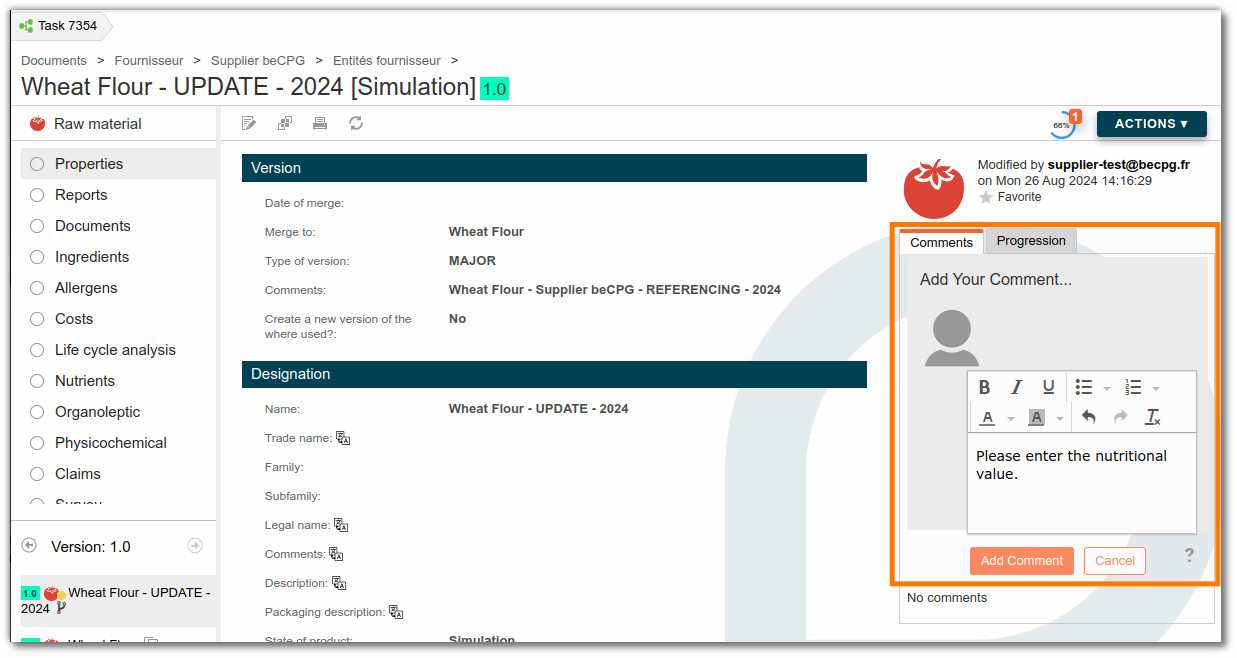
- Or on the product
- Or on lists
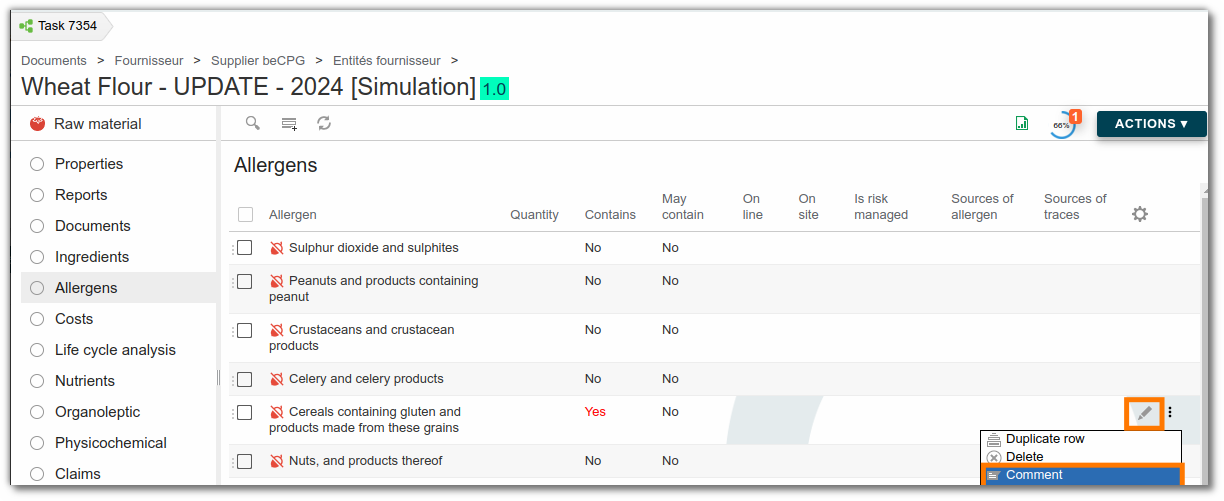
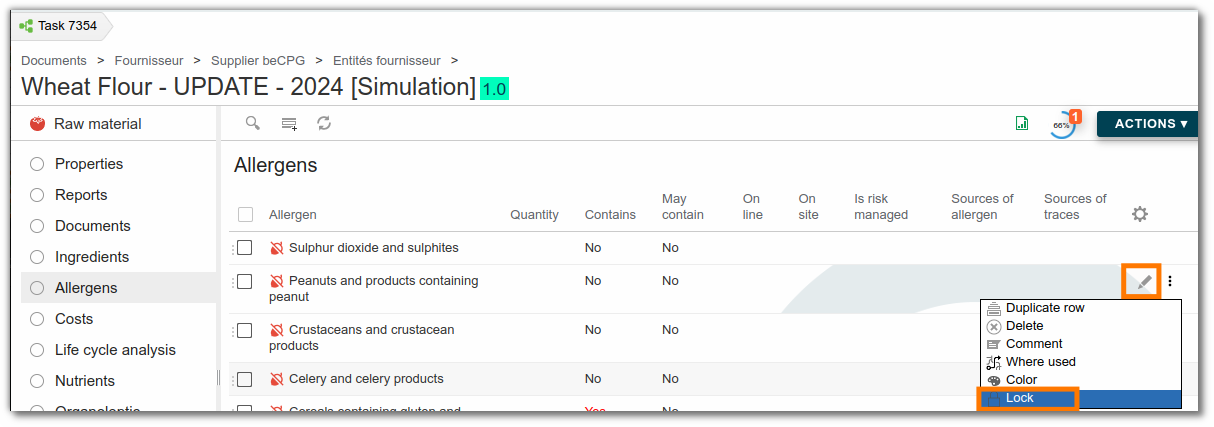
- It is also possible to lock a line to prevent it from being modified by the supplier.
The supplier will then receive a new task with comments.
He can achieve any missing information. Lists that have been validated can no longer be modified.
Supplier document signature
Once the validation task has been validated, 2 new tasks are automatically created in beCPG for the referencing project.

A signature task that sends a pdf copy of the report with the report type : Supplier report
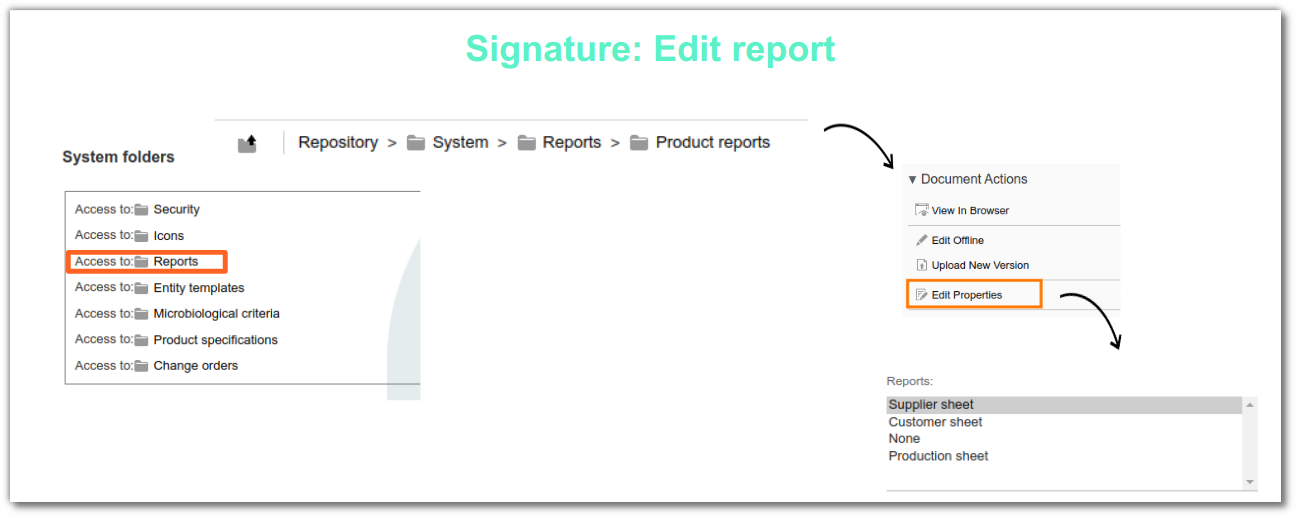
The supplier signs each page of the report via the pdftron portal.
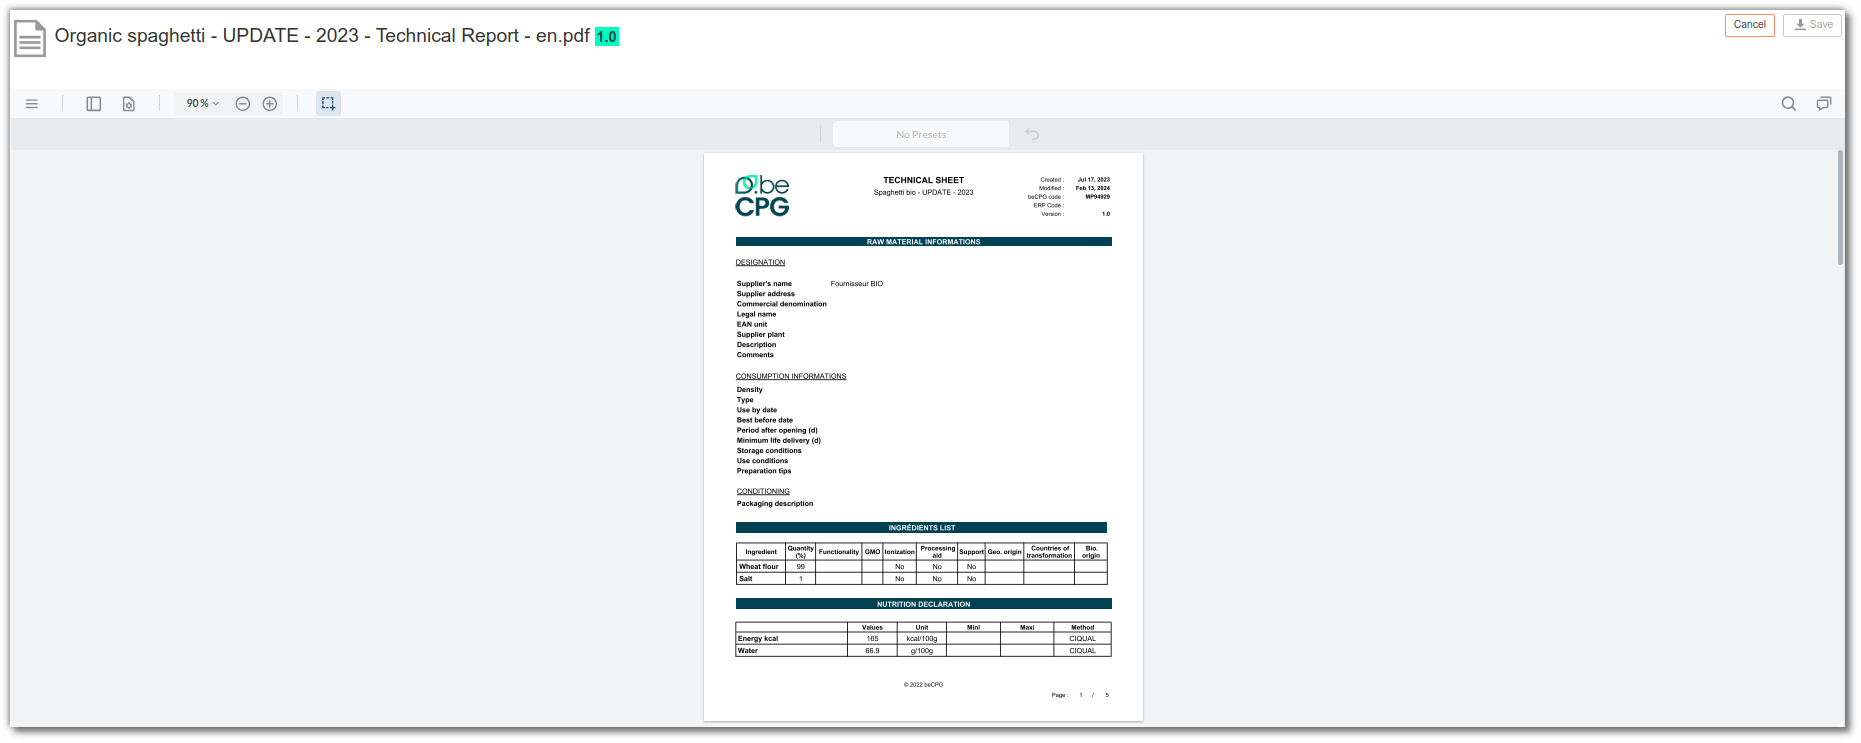
The signed pdf is then stored on the entity in the Document list and the Supplier document folder.
Note: It is impossible to validate the task if all pages are not signed. It is not possible to refuse signature. If you wish to go back at this stage, you must cancel the project and restart the referencing process.
Click here for more information on electronic signing in beCPG.
Closing
Once the supplier has signed, a notification is sent to the project creator, as well as the closing task. On completion of this task, the raw material branch is merging and validating.
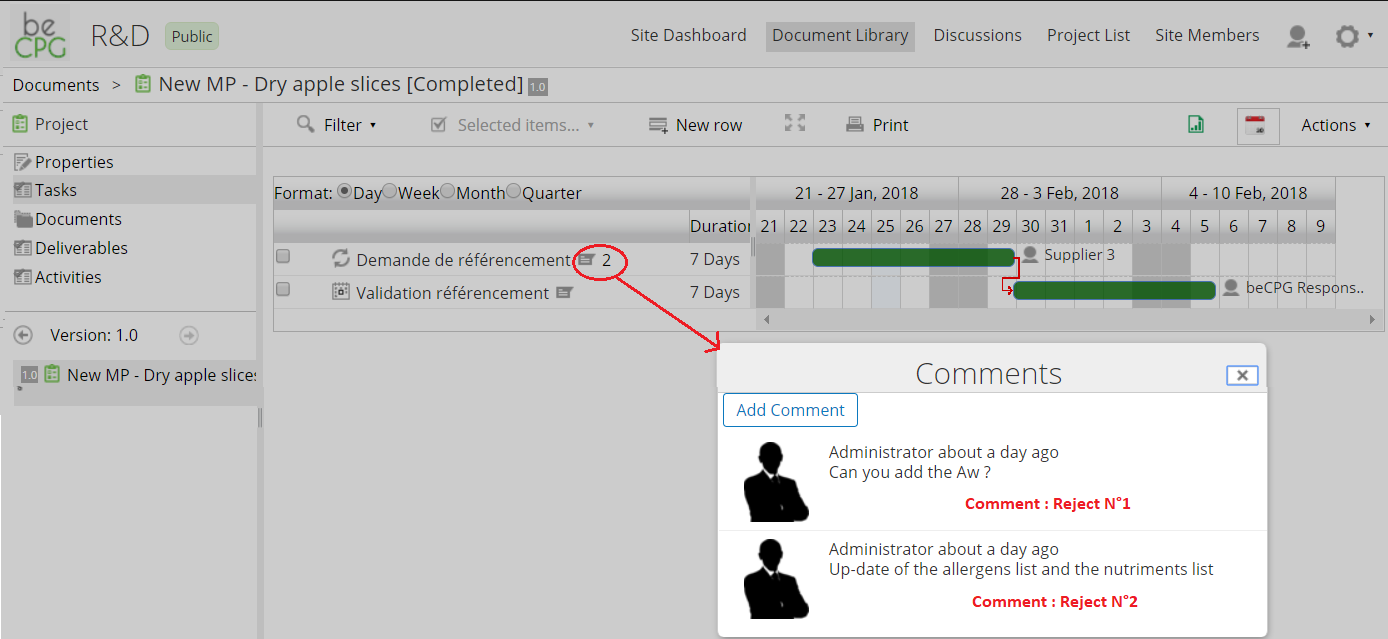
Monitoring referencing via the project
By entering the project code in the search, you can access the associated project. This allows you to view the back-and-forth made via the project, as well as the list of comments entered at the time of refusal.
Discussion
The interface of the “Discussion” dashlet allows users to chat. It is possible to add one supplier per discussion. This interface is specific to a site.
You can use:
- the interface of the dashlet “Discussion” of the collaborative site
- the chat window on the site user’s dashboard.
How to create a Discussion :
In the site : In the banner at the top of the window, you can add the page "Discussion"

When you click on this tab, a specific window pops up.
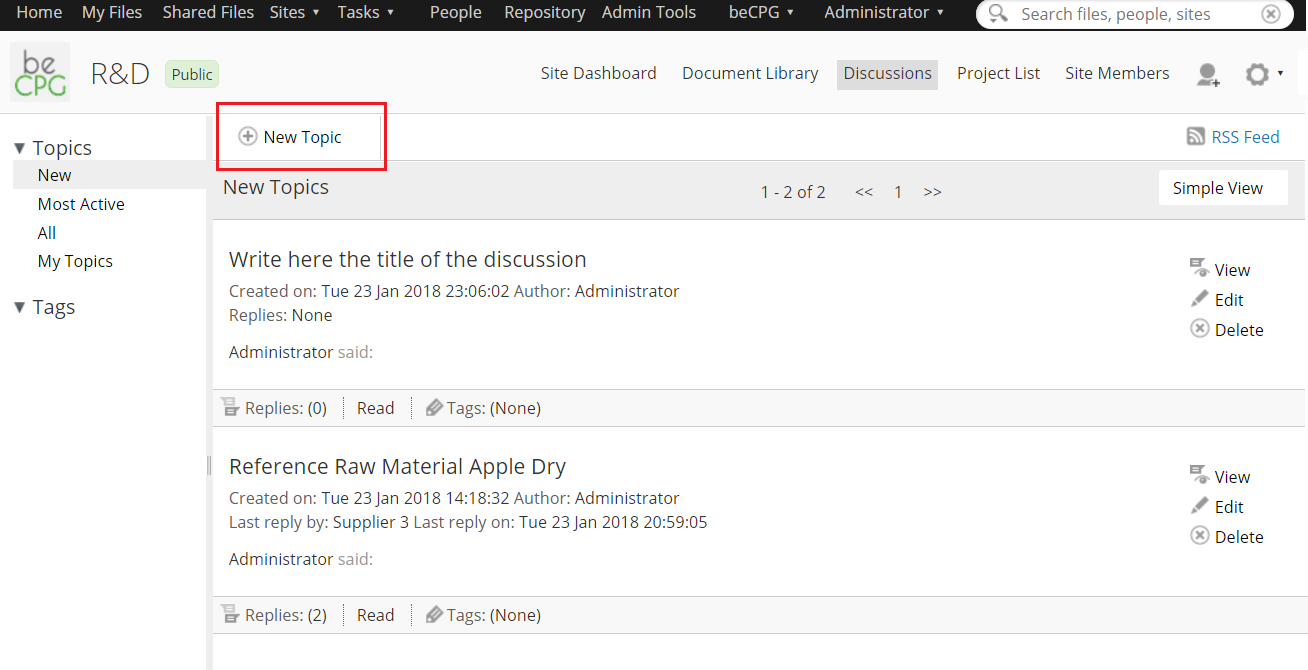
- Click on the « Discussion » tab,
- Click on « New Topic »,
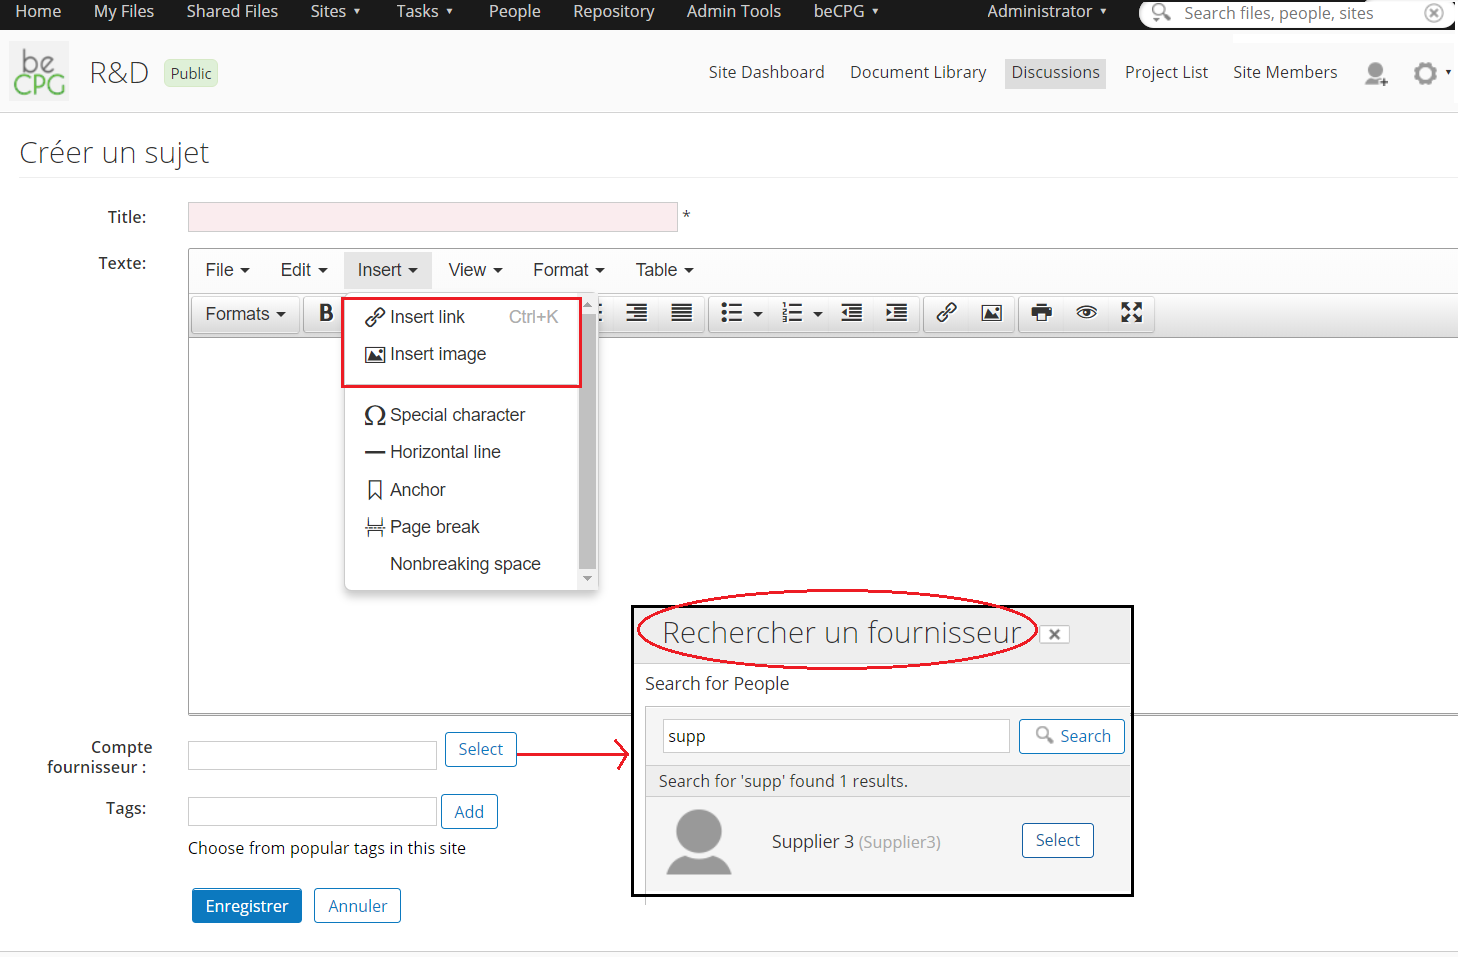
- Complete the information, add links or pictures if needed,
- Add a supplier (select) : only one supplier by Discussion,
- Save.
Note:
Discussions are available at any time:

Discussions in a site can be read by any intern member.
In the user's dashboard:
If you have configured your welcome page (dashboard), you will see by logging in to your profile, all the active discussions from the sites of which you are an active member. You can intervene in the discussion without logging to the different site by using this interface.
